
Stair Nosing Guide: Matching Laminate & Vinyl Flooring
When installing laminate or Vinyl Flooring, stair nosing is a crucial component that ensures both safety and a polished aesthetic for your staircase. This guide will walk you through selecting the right nosing for your specific flooring, navigating installation, and troubleshooting common issues to achieve a durable and professional finish.
Key takeaways
- Stair nosing is essential for both the safety and aesthetic appeal of stairs, protecting edges and creating a finished look.
- When selecting laminate nosing, ensure it matches your planks' thickness, texture, and color, and choose between flush-fit or overlap profiles.
- For vinyl flooring, prioritize nosing that matches your LVP's material, wear layer, and waterproof properties, and is compatible with your installation method.
- Accurate measurement of each stair tread and thorough subfloor preparation are critical for a successful and long-lasting installation.
- Professional installation involves using the correct tools, precise cutting, secure fastening, and sealing edges to prevent moisture.
Our installers find that the key to a durable stair nosing installation is meticulous subfloor preparation and using both adhesive and mechanical fasteners where appropriate.
Why Stair Nosing is Essential for Your Flooring Project
Stair nosing is a vital finishing trim piece that serves multiple critical functions for staircases with hard surface flooring. It provides a finished edge, significantly enhances safety, protects the stair edges from wear, and seamlessly bridges the gap between the tread and riser.
First and foremost, stair nosing plays a critical safety role. By covering the exposed edge of each stair tread, it creates a clearly defined, finished edge that helps prevent slips and falls. Without proper nosing, the edge of a stair can be sharp or uneven, posing a tripping hazard. Secondly, it contributes significantly to the overall aesthetic of your staircase, providing a clean, professional transition between the horizontal tread and the vertical riser. It hides the raw, cut edges of your laminate or vinyl planks, giving your stairs a cohesive and integrated look.
Beyond safety and aesthetics, nosing protects the high-traffic edges of your stairs from daily wear and tear. Stairs are one of the most heavily used areas in any home, and the edges are particularly vulnerable to chipping, scuffing, and damage. A robust stair nosing acts as a protective barrier, extending the life of your flooring investment. Finally, it helps to bridge the slight gap that naturally occurs when installing rigid planks on stairs, ensuring a smooth, stable surface underfoot.

Selecting the Right Laminate Stair Nosing
Choosing the correct laminate stair nosing involves carefully matching its thickness, texture, and color to your existing laminate planks, and selecting an appropriate profile for a seamless and durable finish. This attention to detail ensures your stairs look professionally installed and hold up over time.
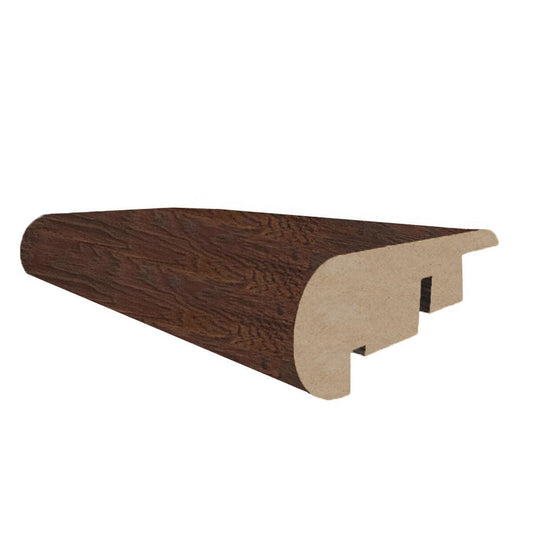
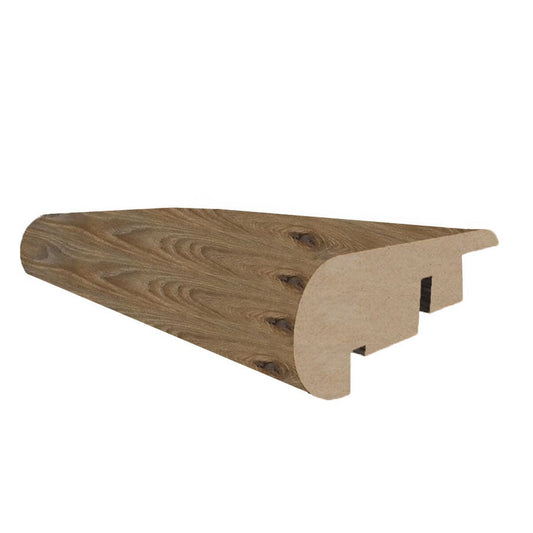
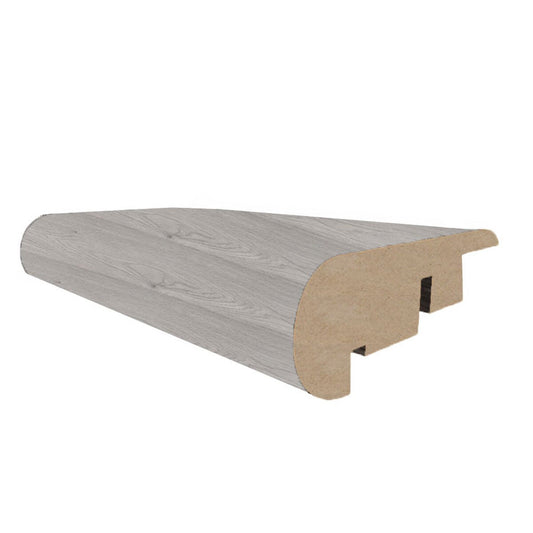
The most critical factor is ensuring the nosing's thickness is compatible with your laminate planks. Laminate Flooring comes in various thicknesses, commonly 8mm, 10mm, or 12mm. The stair nosing must either match this thickness precisely or be designed to accommodate it, often with a slight lip or overlap. Next, focus on matching the texture and grain patterns. Many laminate manufacturers offer coordinating nosing designed to perfectly complement their specific flooring lines, ensuring a continuous visual flow from your floor to your stairs.
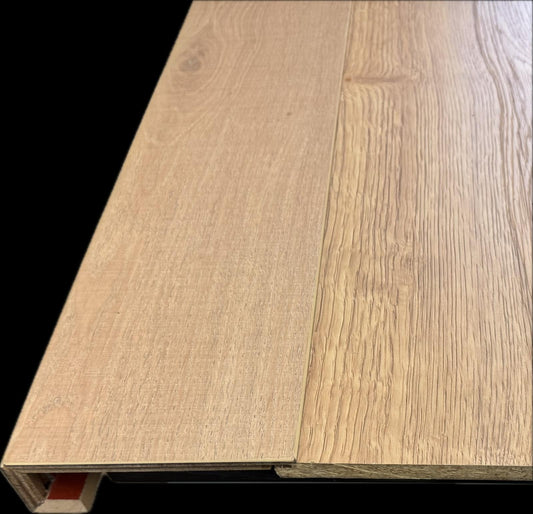
You'll also need to consider the nosing profile: flush-fit or overlap. **Flush-fit nosing provides a seamless, contemporary look**, sitting perfectly level with the stair tread. This often requires precise subfloor preparation and specific installation techniques. Overlap nosing, on the other hand, sits slightly above the tread, creating a small lip. It's often more forgiving during installation and can be a good choice for renovations where achieving a perfectly level subfloor is challenging. Finally, always check the color consistency under different lighting conditions, as natural and artificial light can alter how colors appear. It's wise to examine samples in the actual space where they will be installed.
Navigating Options for Vinyl Stair Nosing
When selecting vinyl stair nosing for your project, prioritize matching its material and wear layer to your luxury vinyl planks, considering its waterproof properties, and ensuring compatibility with your chosen installation method. These factors are crucial for durability and a consistent appearance.
Vinyl stair nosing typically comes in options designed for rigid Luxury Vinyl Plank (LVP) or more flexible sheet vinyl. For LVP, you'll need a rigid nosing that complements the stability and thickness of your planks. It's essential to match the wear layer of the nosing to that of your LVP. The wear layer, measured in mil thickness, dictates the durability and longevity of your flooring. A thicker wear layer on the nosing will better withstand the heavy traffic stairs endure, ensuring it wears at a similar rate to your main flooring.
Consider the installation requirements. Some vinyl nosings are designed to click directly into compatible LVP systems, while others require specific adhesives. Always follow the manufacturer's guidelines for installation to ensure a secure bond and maintain any warranties. For homes in humid climates like Langley, BC, or for stairs in moisture-prone areas such as basements, choosing **waterproof vinyl nosing is critical for long-term durability**. This prevents moisture from seeping into the subfloor and causing damage, a common issue with traditional wood-based products.
Measuring and Preparing Your Stairs for Installation
Accurate measurement of each individual stair tread and thorough preparation of the subfloor are fundamental steps to ensure a professional, secure, and long-lasting stair nosing installation. Rushing these initial stages can lead to costly mistakes and an unsatisfactory finish.
Begin by accurately measuring the length of each stair tread. It's important to measure each tread individually, as stairs are rarely perfectly uniform. Measure from wall to wall, or from stringer to stringer, and add a small buffer (typically about 1/4 to 1/2 inch) for precise cuts and adjustments. Once you have individual lengths, you can calculate the necessary quantity of nosing based on your stair width and the number of treads. Always account for some waste, typically 10-15%, especially if you have mitered corner stairs or plan to practice cuts.
Preparation of the subfloor is equally important. Start by removing any old carpet, adhesive, nails, or staples. The stair treads must be clean, dry, and structurally sound. Inspect for any loose boards or squeaks and address them before proceeding. Use a long level to check for level surfaces across each tread. Any significant dips or humps can prevent the nosing from sitting flush and securely. You may need to use a self-leveling compound or shims to create a perfectly flat and stable surface for a seamless fit.
Step-by-Step Installation Tips for a Professional Finish
Achieving a professional finish for your stair nosing requires the right tools, careful cutting techniques, secure fastening methods, and proper sealing to protect against moisture and ensure longevity. Precision in each step is key to a beautiful and durable result.
Gather your tools before you begin. You'll typically need a miter saw for precise cuts, a measuring tape, a pencil, construction adhesive specifically designed for flooring, a caulk gun, and potentially a brad nailer or screws for extra security. When cutting, always measure twice and cut once. For corner stairs, achieving clean miter cuts at 45-degree angles is essential for a seamless joint. It's often helpful to practice on scrap pieces of nosing first to perfect your technique.
For securing the nosing, most installations rely heavily on a high-quality construction adhesive applied generously to the underside of the nosing and the stair tread. For added security, especially with overlap profiles or in high-traffic areas, you might use a brad nailer or screws. If using fasteners, ensure they are counter-sunk and filled with a color-matched putty for a discreet finish. Finally, to prevent moisture penetration, especially with waterproof vinyl nosing, seal any exposed edges or gaps where the nosing meets the wall or riser with a color-matched, flexible caulk. This creates a tight seal and enhances the overall durability of your installation.
Troubleshooting Common Stair Nosing Issues
Addressing common stair nosing issues like looseness, slight color discrepancies, or minor surface damage often involves straightforward fixes, but complex stair configurations or underlying structural problems may warrant professional assistance. Early intervention can prevent minor issues from becoming major repairs.
If you encounter loose or squeaky nosing pieces, the first step is to identify the source of the movement. Often, re-securing the nosing with additional construction adhesive, and potentially a few strategically placed brad nails or screws, can resolve the issue. If the squeak persists, it might indicate movement in the subfloor beneath the nosing, which may require further investigation. For instances where the color match is slightly off, you might try strategic placement if you have multiple pieces, or for very minor discrepancies, some touch-up pens or subtle staining products can help blend the colors. However, for significant mismatches, reordering the correct color is usually the best solution.
Minor chips or scratches on the nosing surface can often be repaired using specialized flooring repair kits, which typically include colored fillers or touch-up markers. Carefully apply these products according to their instructions to minimize the appearance of the damage. For deeper damage, or if the nosing is severely compromised, replacing the affected piece might be necessary. In cases involving complex stair configurations, structural issues, or if you're simply uncomfortable performing the repairs yourself, it's always best to contact a local flooring professional. Our installers at D&R Flooring can assess the situation in person and provide expert guidance or services to ensure your stairs are safe and beautiful.
Properly selected and installed stair nosing is an indispensable element for any laminate or vinyl flooring project on stairs, ensuring safety, protecting your investment, and delivering a beautifully finished look. By understanding the options, preparing thoroughly, and following best practices, you can achieve a professional and durable outcome for your home's staircase. If you have questions about specific products or need assistance with your project, don't hesitate to reach out to a local flooring expert for guidance.
Shop your flooring project with D&R Flooring
D&R Flooring has everything you need to get the job done — browse our full range of flooring and accessories online, or talk to our team about your space. Shop flooring at D&R Flooring or visit us in Langley, BC.
Frequently asked questions
What is stair nosing?
Stair nosing is a trim piece that covers the front edge of a stair tread, providing a finished look, enhancing safety by defining the edge, and protecting the stair from wear.
Can I use laminate stair nosing with vinyl flooring?
No, you should always use stair nosing specifically designed for your flooring material (laminate for laminate, vinyl for vinyl) to ensure proper fit, durability, and aesthetic match.
How do I choose the right color for my stair nosing?
Choose nosing that closely matches the color, texture, and grain of your flooring planks. Always check samples in the actual lighting conditions of your home before making a final decision.
Is it better to glue or screw stair nosing?
Most stair nosing installations primarily rely on high-quality construction adhesive. For added security, especially on overlap profiles or in high-traffic areas, mechanical fasteners like brad nails or screws can be used in conjunction with adhesive.
How much stair nosing do I need to buy?
Measure the length of each individual stair tread and sum them up. It's wise to add an extra 10-15% to your total measurement to account for cuts, potential mistakes, and future repairs.
What's the difference between flush-fit and overlap nosing?
Flush-fit nosing sits level with the stair tread for a seamless look, often requiring precise installation. Overlap nosing sits slightly above the tread, creating a small lip, which can be more forgiving during installation.